A DIY drip irrigation system is a great way to save water and keep plants consistently hydrated—especially in hot climates. You don’t need expensive gear to get started; a simple setup can be built with basic materials.
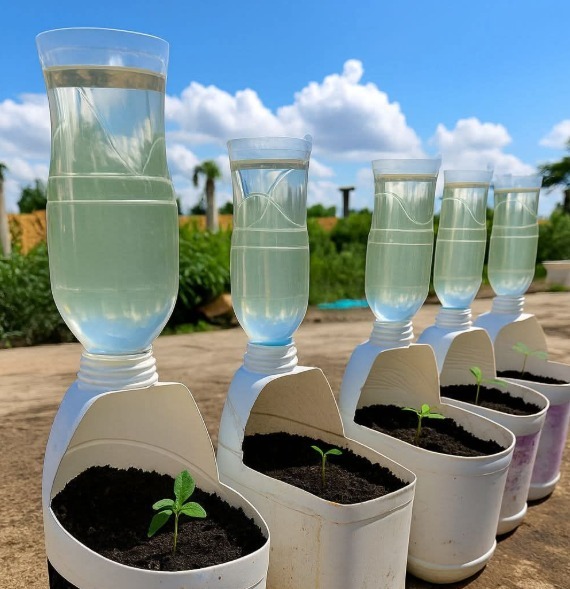
🌱 Simple DIY Drip Irrigation (Bottle Method)
This is the easiest option for small gardens or potted plants.
What you need
- Plastic bottles (1–2 liters)
- Needle or small nail
- Water
Steps
- Make 1–3 tiny holes in the bottle cap.
- Fill the bottle with water.
- Turn it upside down and place it into the soil near the plant roots.
- Water will slowly drip out over several hours.
Best for: houseplants, small vegetable patches, balcony gardens.
🌿 Hose-Based Drip System (More Efficient)
This works well for larger gardens.
What you need
- Garden hose or PVC pipe
- Small connectors or drip emitters (optional)
- A water source (tap or tank)
Steps
- Lay the hose along your plant rows.
- Poke tiny holes at intervals near plant roots.
- Connect the hose to your tap.
- Turn on low pressure so water drips slowly instead of spraying.
You can improve control by adding a simple valve or timer.
💧 Gravity-Fed System (No electricity needed)
Great if you want automation without pumps.
What you need
- A water container (bucket or drum)
- Tubing (IV tubing or small pipes)
- Stand or raised platform
Steps
- Place the container at a higher level than your plants.
- Attach tubing at the bottom.
- Run lines to each plant.
- Adjust flow using small clamps or knots in the tubing.
⚙️ Tips for best results
- Water early morning or evening to reduce evaporation
- Keep holes small to avoid flooding
- Check regularly for clogs
- Add a simple filter (cloth) if using tank water
🌾 Why it’s useful
- Saves water (important in dry regions)
- Reduces weeds (water goes directly to roots)
- Prevents overwatering
If you tell me what you’re growing (vegetables, lawn, pots, etc.), I can help you design a setup tailored exactly to your space.
